
Hey there! So, you’ve decided to use Laravel 12 and want to install Laravel Breeze for authentication? Awesome decision! Breeze is like that reliable buddy who shows up with exactly what you need login, registration, password resets, and more. Now, heads up: Laravel 12 took things up a bit, and Breeze isn’t an option in the new installer anymore. But don’t sweat it it’s still a breeze (sorry, had to!) to install manually. I’m here to guide you through it, step by step, with a few tips I’ve learned along the way. Let’s dive in and get your authentication system up and running!
What Is Laravel Breeze?
If you have not done this yet, let me briefly explain it to you. Laravel Breeze is a starter kit that installs everything you need for user authentication on your Laravel project. The following is included:
- Login: Securely allow users to log in.
- Registration: Easy sign-up forms.
- Password Reset: To cater to those oh-so-prevalent “I forgot my password” situations.
- Email Verification: Verify emails of users.
- Password Confirmation: Extra security while doing sensitive tasks.
It also adds a simple profile page with which users can change their name, email, and password. Breeze is constructed on Blade templates and Tailwind CSS, so it’s instantly snappy and modern-looking. It’s lightweight, easy to customize, and has full control over the code. If you don’t need fancy add-ons such as teams or two-factor auth, Breeze is your best option. Think of it as the perfect starting point simple but powerful.
Why Pick Breeze for Laravel 12?
You might be thinking, “Laravel 12 has React and Vue options—why bother with Breeze?” Fair question! Here’s why I love it:
- Simplicity: It’s straightforward and doesn’t overload you with features.
- Flexibility: Choose between Blade, Vue, or React stacks—whatever suits you.
- Compatibility: Works seamlessly with Laravel 12, even without the installer.
- Customization: You get all the code, so you can change anything you want.
For me, Breeze is ideal when I want to kick off a project fast and keep things lean.
Let’s Get Breeze Installed in Laravel 12
Alright, let’s roll up our sleeves and do this! Here’s how to install Laravel Breeze in a fresh Laravel 12 project.
Step 1: Start with a New Laravel 12 Project
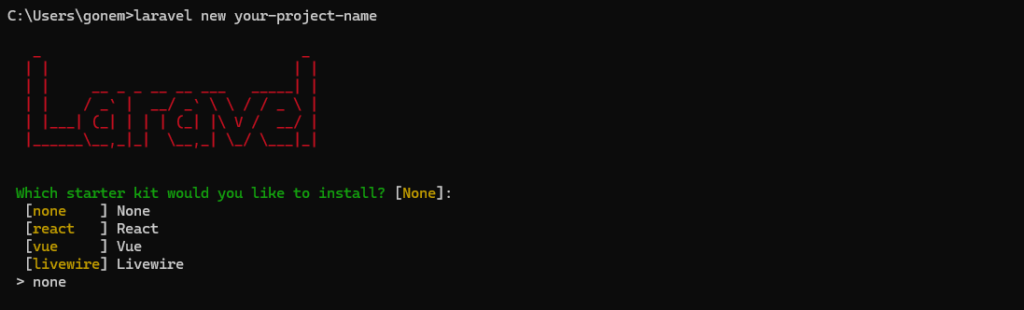
First, you need a Laravel 12 project to work with. Since Breeze isn’t in the installer, we’ll start from scratch. Open your terminal and type:
laravel new your-project-nameThe installer will ask which starter kit you want. Pick “None” like this:
If you prefer Composer, you can run:
composer create-project laravel/laravel your-project-nameEither way, you’ll have a clean Laravel 12 project ready to go.
Quick Tip: Double-check that your Laravel installer or Composer is updated. It’ll save you from weird errors later.
Step 2: Add Laravel Breeze with Composer
Move into your project folder:
cd your-project-nameNow, install Breeze as a dev dependency:
composer require laravel/breeze --devThis grabs Breeze and preps it for installation. So far, so good!
Step 3: Install Breeze with the Artisan Command
Here’s where it all comes together. Run:
php artisan breeze:installYou’ll see a prompt asking which frontend stack you want. Breeze gives you these options:
- Blade with Alpine.js: Classic server-side views with a dash of JavaScript.
- Livewire with Alpine.js: Dynamic components, still in Blade.
- React with Inertia.js: A slick, single-page-app feel with React.
- Vue with Inertia.js: Same vibe, but with Vue.
I’ll stick with Blade with Alpine.js for this guide since it’s super straightforward, but pick whatever you’re comfortable with.
Once you choose, Breeze sets up all the auth views, routes, controllers—everything you need.
Step 4: Set Up Your Database
Breeze needs a database to store user info. Open your .env file and configure your database. For MySQL, it might look like:
DB_CONNECTION=mysql
DB_HOST=127.0.0.1
DB_PORT=3306
DB_DATABASE=your-project-name
DB_USERNAME=root
DB_PASSWORD=
If you’re using SQLite, just make sure database/database.sqlite exists.
Now, run the migrations to create the tables:
php artisan migrateDone! Your database is all set.
Newbie Note: Migrations are like blueprints for your database—super handy for setup.
Step 5: Build Your Frontend Assets
Breeze uses Tailwind CSS, which needs to be compiled. Install the npm dependencies first:
npm installThen compile everything:
npm run devThis creates the CSS and JS files in public/build. Laravel 12 uses Vite, which is really fast.
Pro Tip: For production, use npm run build to minify your assets.
Step 6: Test It Out
Let’s see it in action! Start your server:
php artisan serveHead to http://localhost:8000 in your browser. You should see the Laravel welcome page with “Log in” and “Register” links up top. Go to /register, sign up, and if you land on /dashboard, you’re golden! Try logging in and out to make sure it’s all working.

If it’s smooth sailing, congrats—you’ve got Breeze installed! Here is how to make an Easy Laravel Visitor Counter for your Project!
Conclusion
There you go—installing Laravel Breeze in Laravel 12 is a cinch once you’ve got the steps down. Even without the installer, it’s a stellar choice for authentication. Quick recap:
- Create a Laravel 12 project (no starter kit).
- Add Breeze with Composer.
- Run breeze:install and pick a stack.
- Set up your database and migrate.
- Compile assets with npm.
- Test your auth routes.
You’re now ready to build something amazing with a solid auth foundation. Whether you’re a newbie or a Laravel veteran, Breeze makes it easy. Happy coding, and let me know if you hit any bumps!