
So you spent a lot of time developing a very amazing website. After that, you want to share it with your friends and show them your achievement and progress. That’s why I will be helping you with how you can host any website for free on GitHub. No worries even if you are truly new with this whole GitHub thing. So, before getting your website online let’s understand what’s GitHub.
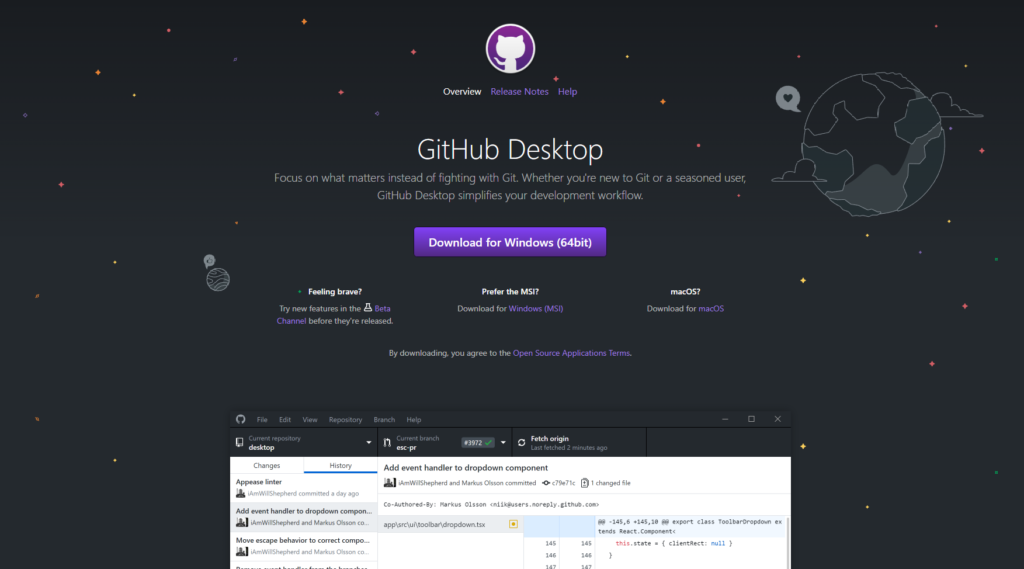
In this article, I will be showing you how you can publish your website using GitHub Desktop for totally free.
What is GitHub?
According to Github, they are “GitHub is a code hosting platform for version control and collaboration. It lets you and others work together on projects from anywhere.” Github is a company that provides a cloud-based Git repository hosting service for free. The UI of GitHub is very minimal and easy and anyone can SignUp and start working.
GitHub has a huge community and provides many amazing and handy features for its users, making the workflow smooth. Github also has different plans with additional pers for the team and organization.
Here is How to get GitHub Pro for Free a little gift for you.
Can you Host a Website on GitHub?
You might have heard people storing the codes and sharing them on Github. Here is a simple answer to your question, Yes, you can host a static website on GitHub totally free of cost.
Steps for Hosting a Website on GitHub
1. Create a GitHub Account
Let’s not waste time and create a GitHub account for yourself. Once you have the account you will have access to free hosting and other amazing features. Creating a GitHub account takes less than 2 minutes.

With a Github account, you will enter a new world and can easily connect with other developers like yourself. The best thing is you will be able to contribute to other open-source projects in any place in the world.
2. Downloading and installing the GitHub Desktop app
It’s nothing serious this is just an app that will let you transfer your files to GitHub. Now you need to install the app from the link given below.
After you are done successfully downloading the respected setup files. Install the application “GitHub Desktop”.
3. Create a new GitHub project
We can’t just start transferring the website files to GitHub so that you can Host any Website for Free on GitHub. For that, you must create a ‘Repository‘ Folder and after that copy your files to that folder.
Now open the application of GitHub Desktop that you had just installed on your device. Secondly, click on the “Create New Repository” button.

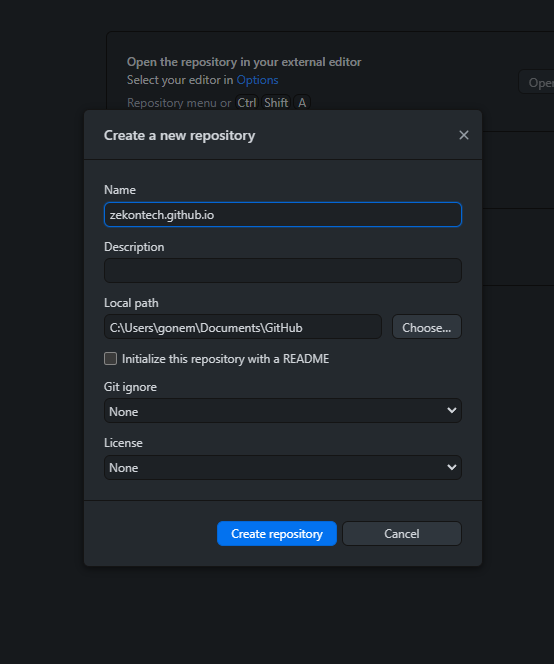
After you click on “Create a New Repository on your hard drive” a dialog box will get popped to fill in details. What you need to do next is fill in the name of the repository as given below.
username.github.io
Don’t forget to replace the username with your GitHub account username. Also, let me make it clear this will be the very site link that you will be sharing with your friends. The URL/ web address will look like https://username.github.io/ after you publish it.
The next thing you need to do is select the local path on your hard drive/computer where to store the files. Now chose a path where you want to store your files. I usually set Documents\GitHub as the path of the address. This is where I make my repository on hard disk before hosting any website for free on GitHub. If you are following me your path should look like this:
Documents\GitHub\username.github.io
Copy the website files to the local repository path is the next thing you need to do. Now go to the path where you have saved your static website. Now copy all the files from that directory and paste them into the folder that was just made as to the local hard disk repository inside “Documents\GitHub\username.github.io”

4. Commit Files to GitHub
Now it’s time to commit your files. Before that let’s understand what a commit on GitHub is.
To “commit” files in GitHub means to take a “preview” of the files and folders in their exact current state. By which they become ready to be pushed up to a repository on GitHub.
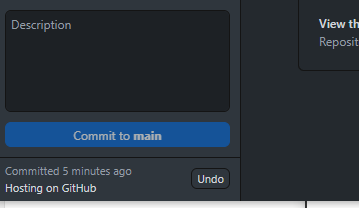
But before you commit the files you need to add a Summary. The text area for entering the summary of the commit is in the left bottom corner. Most people write what changes they have made or what they have added in the Summary. But you can write anything as your wish like “Hosting on GitHub“.
You might be what’s that Description on the second box. You can write in detail what changes you have made to the code. It will be really helpful if you have to go back and check when you added certain features to the project. Even if you are working in a team the other team members can easily understand what changes have you made till the time of commitment.
After you are done filling the “Summary” and “Description” click on the “Commit to master” button right below the text fields.
5. Publish your website
After you are successful in clicking the Commit to master button everything on the page will be blank and will be ready to push.
If you have made any mistakes or you need to make some changes you can even undo them. The option is present on the left button corner of the window.
Now everything is set and ready to go, You can push the commit to GitHub. Push is nothing but uploading your committed files to a GitHub repository at the state it was committed.
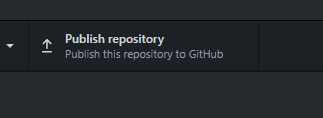
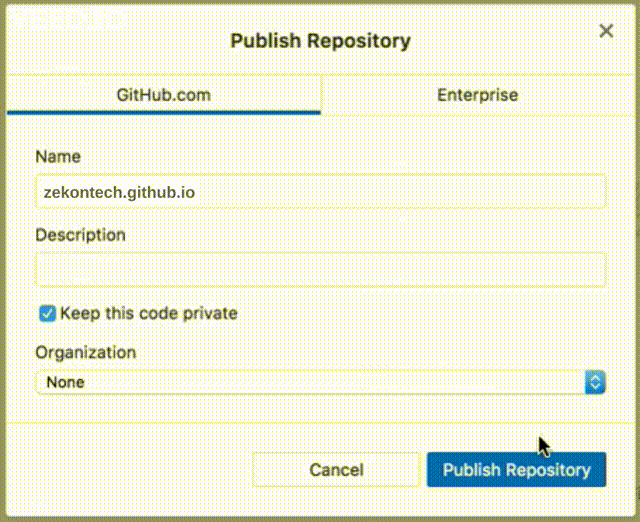
Now click on the “Publish repository” button on the right top bar of the GitHub Desktop App. You will now see a popup for the login to GitHub.
Now you will need to sign in to your GitHub account if you haven’t done so click on sign in and continue to the browser now enter your login credentials and sign in. Secondly, you will need to “Authorize GitHub Desktop” for your account.

The next step is to click on the “Publish repository” button to begin the upload process. Before the upload process begins you need to make some changes like keeping the code private or public. but you need to make sure you have “unchecked Keep this code private“.
You need to make sure all the files have been successfully uploaded to GitHub for that do follow the link below and replace the username with your GitHub username.
https://github.com/username/username.github.io
Once everything is checked and uploaded you are good to go!
6. Share your website!
The last thing to do is check your freely hosted website on GitHub. For that, you will need to visit the link below. This is the same link others will also be able to see the website.
https://username.github.io/
Boom! Your site is up and working perfectly. 😁🙌 You can now :
- Create a new GitHub repository
- Commit files.
- Host any Website for Free on GitHub.
How to update the freely hosted site on GitHub?
The next command question that might arise in your mind is, How can you update your site after you made some changes to the code? For example, if you decided to add new images to the site how can you do so?
For that, you can simply edit the local repository files then commit them and push them to main. But let me remind you it might take a few minutes after you commit to the main. If you don’t see any changes you can try doing a hard reload by pressing “Ctrl + Shift + R” on your browser.
I hope this article was amazing and helped you Host any Website for Free on GitHub, If it did be sure to share this post with your friends and family members to give them an idea about how you can host a website completely free.
You can also read how to Get GitHub Pro for Free! 😉